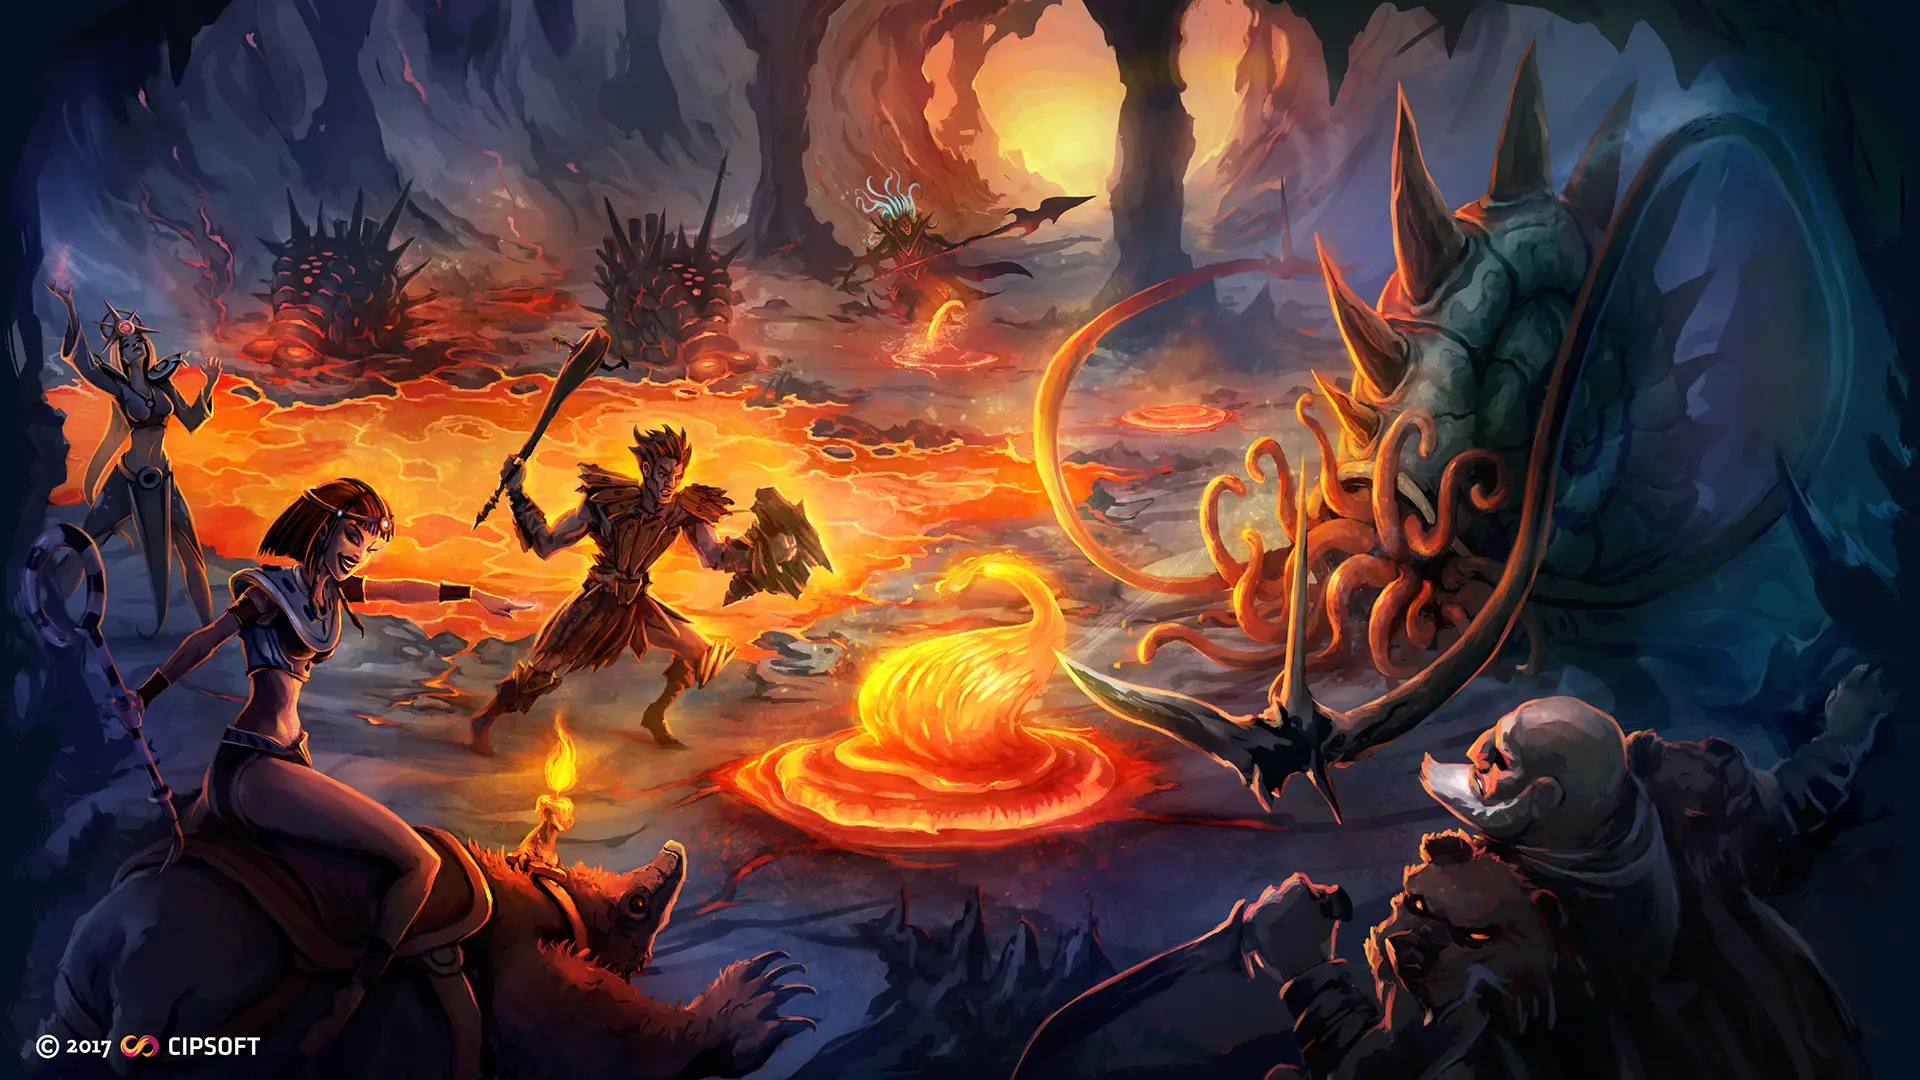
 Spells Rotation
Mastering spells is key to optimizing efficiency in any hunt, boss fight or any adventure in Tibia. Here, you'll find detailed information on spell usage based on your vocation, level, and combat type. Whether you play solo, in a team, or face challenging bosses, proper spell management will make the difference between a profitable hunt and unnecessary supply waste.
Executing precise spell rotations improves DPS and sustainability in prolonged hunts. Here, you will find optimal sequences to maximize damage, healing, and support while considering cooldown times and mana efficiency. Adapting rotations according to team composition and enemy type can significantly reduce pressure on healers and improve group stability.
 Druid
Druid
 Knight
 Monk
Monk
 Paladin
 Sorcerer
Druid Spell Rotations
The Elder Druid (ED) excels at both elemental damage and healing, alternating ice/earth spells with healing routines. Their high mana regeneration lets them cast area spells frequently for maximum damage, but when hunting solo they must manage HP (using Utamo Vita or Mana Shield potions), and in parties they focus on keeping the knight/tank alive. Below are recommended rotations for Solo Hunts, Party Hunts, and Boss Fights in three level brackets: 150–300, 300–500, and 500–700.
Solo Hunt
Levels 150–300
Basic Rotation: Alternate Strong Ice Wave (Exevo gran frigo hur) and Terra Wave (Exevo tera hur) for continuous damage intercalating with Ultimate Healing (Exura vita) and Utamo Vita for healing and defense.
A typical cycle:
- Terra Wave (Exevo tera hur).
- Strong Ice Wave (Exevo gran frigo hur).
- Terra Wave (Exevo tera hur).
- Area rune (e.g., Avalanche or Great Fireball).
- Repeat, waiting for each spell's cooldown intercalating UE's cooldowns.
Ultimate Spells: Every ~40s use Eternal Winter (Exevo gran mas frigo) or Wrath of Nature (Exevo gran mas tera) to finish off large pulls. Choose Eternal Winter against ice-sensitive targets; Wrath of Nature for earth-vulnerable creatures.
Survival: Keep Mana Shield (Utamo Vita) or Mana Shield potions active if pulled into danger.
Suggest Hunts:
- Lycantrope Cave (Edron) with Great Fireball runes.
- Glooth Factory (Oramond) with Great Fireball runes.
- Summer Court (Feyrist) hunts using Avalanche against grouped monsters.
- Issavi Tombs (Issavi) with Avalanche/Sudden Death runes.
Levels 300–500
You maintain the basic rotation loop but now unlock Ice Burst/Earth Burst via the Wheel's Twin Bursts perk—ring spells with strong AoE and a 22s CD (down to ~14s at Tier 3).
- Ice Burst (Exevo ulus frigo).
- Terra Wave (Exevo tera hur).
- Strong Ice Wave (Exevo gran frigo hur).
- Terra Wave (Exevo tera hur).
- Area rune (e.g., Avalanche or Great Fireball).
- Repeat, waiting for each spell's cooldown intercalating with Ultimate Healing (Exura vita) for healing.
Ultimate Spells: You must start using Restoration (Exura max vita) has your second healing spell, rotate it with Ultima Healing (Exura vita) first, then max healing.
Survival: Keep using Mana Shield (Utamo Vita) or Mana Shield potions active if pulled into danger, and then use Cancel Magic Shield (Exana vita) to remove the shield if you are already safe.
Suggest Hunts:
- Dream Courts (Feyrist) hunts using Avalanche or Great Fireball against grouped monsters.
- Cobra Bastion (Ankrahmun) using Great Fireball against grouped monsters.
- Netherworld (Port Hope) with Great Fireball runes.
- Issavi Tombs (Issavi) with Avalanche runes.
Levels 500–700
Your loop remains Ice/Terra Wave + runes + Twin Bursts, but now you're firing Ice/Earth Bursts every ~14–18s at peak damage thanks to advanced Wheel perks. High-end gear (Momentum helmet + Imbuements) makes chaining spells effortless.
Survival: Keep using Mana Shield (Utamo Vita) or Mana Shield potions active if pulled into danger. At these levels and you may also consider using the Avatar of Nature, Stone Skin Amulets and Might Rings should be part of your refills, as well as using foods (Blessed Steak, Blueberry Cake). This will be the difference between life and death.
Suggest Hunts:
- Dream Courts (Feyrist) hunts using Avalanche or Great Fireball against grouped monsters.
- Iksupan (Port Hope) with Avalanche runes.
- Cobra Bastion (Ankrahmun) using Great Fireball against grouped monsters.
- Netherworld (Port Hope) with Great Fireball runes.
- Brain Grounds (Venore) with Great Fireball runes.
- Issavi East (Issavi) with Avalanche runes.
Party Hunt
Party Hunts: In this range, Elder Druids (ED) excel in duo or small teams. The classic ED+EK duo ("power hunt") is highly effective. The knight tanks 4–8 monsters while the druid spams area spells and heals the knight. For example, the Darashia Burster Spectre spawn is a popular 150–200 hunt – the ED should equip a Necklace of the Deep for immunity against water damage, and the RP teammate should use Envenomed Arrows (Bursters are immune to physical attacks). In Mad Mage's basement (Haunted Temple/Buried Cathedral), Level 180–220 Gazer Spectres can be hunted by an ED+EK: these spectres reflect fire damage (166% back), so avoid fire spells. Notably, a March 2025 patch added a very rare Stone Skin Amulet drop from Gazers, making this hunt more lucrative. Other hunts include Lower Roshamuul undead (cultists and devovoirs) or Lower Spike (earth and fire monsters) which ED+EK can tackle by using the appropriate elemental rods.
Healing & Positioning: The ED should stay behind the tank, keeping Heal Friend and Nature's Embrace ready. With the Blessing of the Grove Wheel perk, healing output is boosted (+6–12% on moderate-damaged targets, up to +12–24% on low-HP targets), so time your heals when the knight is below ~60% HP. Always carry mana potions but regenerate naturally during hunts. Avoid spamming Magic Shield unnecessarily (it drains mana without aiding Magic Level gain) – instead use healing spells and potions when safe.
Spam area runes on clumped monsters. Use Sudden Death to finish off tough targets. If hunting Gazers, never use fire spells (they reflect damage). Use Mass Healing/NE on groups, and Heal Friend on the knight when single-target healing is needed. In general, the ED's role is healing and sustained AoE damage: let the knight tank and focus the ED's mana on offensive runs and timely healing.
Synergy: The duo ED+EK is "one of the best groups" for power-hunting. In a full party (ED+EK+RP+MS), the druid remains the primary healer/support. For example, ED+EK+MS hunts allow the druid to heal while the MS and EK deal burst damage. An ED can also self-heal: note that Heal Friend can target oneself (heals 50–100% of own HP). Always communicate: e.g. have the knight signal when low on HP for a quick heal.
Party Hunts: In this range, Elder Druids join the hardest respawns. Common hunts include Oramond (Marauders/West), Gloom Pillars, and War Zone spawns (Goroma and Zao). These areas often have many creatures clumped together – perfect for an ED to AoE-kill. For example, Gloom Pillars (Cranion's volcanic spawns) and the Seacrest Grounds (Yalahar quest area) were significantly buffed with extra monsters, so a high-level ED with mana from Charms can deal massive damage. The ED should keep Avatar of the Ancients or Nature's Embrace ready for emergency full-heals. Often these hunts are run with a full team (ED+EK+RP+MS+SP); the druid simply spams runes (e.g. Avalanche, Cyclone, Treasures of Renown with enchantments) and heals off the remaining damage. With level 600+ gear and Blessings of the Grove stage 3, every group heal is +24% stronger, turning deadly pulls into manageable fights.
Healing & Positioning: Endgame bosses/trains have multi-hit attacks and ultimates. The ED should use Mass Spirit Mend and Mass Healing frequently. If Gift of Life is unlocked, using it right after a large heal will overheal allies (30% HP at Stage 3) and reset all spell cooldowns by –60s. Always stand in support position: e.g. at a boss room entrance to heal from outside. Some bosses have area curses or runes; EDs can cleanse with Restore Life/Weakness if needed. Mana management is critical – use all buffs (30% mana on damage done via Life Leech perks, etc.) so you don't dry up mid-fight.
Synergy: At high levels, druids often run hybrid roles. For example, in a Ferumbras Ascendant party they might be one of two healers or even alternate to MegaBurst between heals (spamming their best elemental spells). They coordinate with Paladins for doorways and with Knights for kiting. With Lucky Cap or Prismatic stone affordances from Wheel, the ED can survive longer pulls. In short, the ED remains the lifeline: most meta teams include at least one druid to ensure tanks never drop.
Party Hunts: In this range, Elder Druids join a few of the hardest respawns. Common hunts include Issavi (East/West), Feaster of Soul areas, and War Zone spawns. These areas often have many creatures clumped together – perfect for an ED to AoE-kill. For example, Gloom Pillars (Cranion's volcanic spawns) and the Seacrest Grounds (Yalahar quest area) were significantly buffed with extra monsters, so a high-level ED with mana from Charms can deal massive damage. The ED should keep Avatar of the Ancients or Nature's Embrace ready for emergency full-heals. Often these hunts are run with a full team (ED+EK+RP+MS+SP); the druid simply spams runes (e.g. Avalanche, Cyclone, Treasures of Renown with enchantments) and heals off the remaining damage. With level 600+ gear and Blessings of the Grove stage 3, every group heal is +24% stronger, turning deadly pulls into manageable fights.
Healing & Positioning: Every hunt could have a few danger situations. The ED should stay in a defensive position and use Mass Healing frequently. If Gift of Life is unlocked, using it right after a large heal will overheal allies (30% HP at Stage 3) and reset all spell cooldowns by –60s. Always stand in support position: e.g. at a boss room entrance to heal from outside. Some bosses have area curses or runes; EDs can cleanse with Restore Life/Weakness if needed. Mana management is critical – use all buffs (30% mana on damage done via Life Leech perks, etc.) so you don't dry up mid-fight.
Synergy: At high levels, druids often run hybrid roles. For example, in a Ferumbras Ascendant party they might be one of two healers or even alternate to MegaBurst between heals (spamming their best elemental spells). They coordinate with Paladins for doorways and with Knights for kiting. With Lucky Cap or Prismatic stone affordances from Wheel, the ED can survive longer pulls. In short, the ED remains the lifeline: most meta teams include at least one druid to ensure tanks never drop.
Boss Fights
Summary ED Roles: An Elder Druid (ED) in any boss fight will position safely behind the tank, apply elemental damage with adaptive rotations, sustain the party with heals, and exploit Destiny perks like Blessing of the Grove, Gift of Life, and Healing Link to maximize support and damage.
Detailed Role
| Aspect | Description |
|---|---|
| Positioning & Mechanics Awareness |
|
| Adaptive Spell Rotation |
|
| Healing & Support |
|
| Destiny Perks in Action |
|
| Self-Sustain & Resource Management |
|
Knight Spell Rotations
Managing incoming damage is crucial for a Knight. In party hunts, keeping utamo tempo active while alternating exura ico and exura ensures efficient damage absorption without overloading healers. In solo hunts, controlling creatures with exeta res combined with exura gran ico extends the hunt duration. Against bosses, timing utito tempo during peak damage phases is essential to avoid unexpected spikes.
Solo Hunt
Levels 150–300
Basic Rotation: Knights rely on powerful area spells in low‑mid level solo hunts. The basic rotation often starts with Berserk or Fierce Berserk to hit multiple monsters, followed by Front Sweep or Groundshaker to finish off weaker creatures.
A typical cycle:
- Berserk (Exori).
- Fierce Berserk (Exori gran).
- Berserk (Exori).
- Front Sweep (Exori min) or Groundshaker (Exori mas) if four or more enemies remain.
- Challenge (Exeta res) or Chivalrous Challenge (Exeta amp res) to keep mobs close.
- Repeat, waiting for each spell's cooldown intercalating with Intense Wound Cleansing (Exura gran ico) for healing.
Ultimate Spells: Groundshaker (Exori mas) hits large groups, while Annihilation (Exori gran ico) delivers an enormous single‑target hit on bosses or remaining strong monsters. Chivalrous Challenge (Exeta amp res) can be used to convert non‑melee attackers
Survival: Always keep Protector (Utamo tempo) active before a big pull. Maintain a full supply of health potions, and always carrying with you Life Leech and Mana Leech imbuements for passive recovery. Position yourself to avoid being surrounded the creatures are low on health.
Suggest Hunts:
- Barkless Cults (Ab'dendriel) with physical damage or envenomed damage.
- Werehyaenas (Darashia) with ice damage.
- Werebears (Grimvale) better with fire damage.
- Grim Reapers (Yalahar) with fire or energy damage.
- Hellspawns (Yalahar) with fire or energy damage.
- Minotaur Cults (Thais) better with ice damage.
- Lava Luker (Kazordoon Sewers) with ice damage.
- Medusa Tower (Port Hope) with fire damage.
Levels 300–500
At higher levels, you maintain the basic rotation loop but knights lean even more on explosive AoE. A typical rotation now begins with Blood Rage (Utito tempo) to pump up damage.
- Berserk (Exori).
- Fierce Berserk (Exori gran).
- Berserk (Exori).
- Front Sweep (Exori min) or Groundshaker (Exori mas) if four or more enemies remain.
- Challenge (Exeta res) or Chivalrous Challenge (Exeta amp res) to keep mobs close.
- Repeat, waiting for each spell's cooldown intercalating with Fair Wound Cleansing (Exura med ico) for healing.
Ultimate Spells: You must start using Fair Wound Cleansing (Exura med ico) has your primary healing spell. Also use Blood Rage (Utito tempo) to boost damage and Charge (Utani tempo hur) to increase your speed between pulls.
Survival: Continue wearing defensive gear and having Stone Skin Amulets and Might Rings. You should also have a stack of Supreme Health Potions. Keep at less a Pot of Blackjack, a Rotworm Stew, or a Strawberry for any emergencies.
Suggest Hunts:
- Catacombs (Oramond) with ice or physical damage.
- Cobra Bastion (Ankrahmun) better with fire damage.
- Issavi Tombs (Issavi) better with death damage.
- Asuras Palace (Port Hope) with physical or energy damage.
- Temple of the Moon Goddess (Marapur) better with envenomed damage.
Levels 500–700
In high‑level solo hunts, knights focus on pure power. A constant rotation might be: Blood Rage (Utito tempo) for offense, then Fierce Berserk (Exori gran), Front Sweep (Exori min), Groundshaker (Exori mas) in succession to hit huge groups, followed by Berserk if anything small remains. Keep Haste (Utani hur) and Protector (Utamo tempo) up between bursts as needed. Use Annihilation (Exori gran ico) on particularly tough monsters every 30 seconds.
Survival: Survival in this range is more about gear and strategy. Use terrain barriers (walls, doors) fully – corner enemies so you face limited angles. Use the Avatar of the Ancients and Stone Skin Amulets and Might Rings to absorb damage in high damage peeks. You can use a Pot of Blackjack or a Rotworm Stew with a Strawberry Cake when you are in danger.
Suggest Hunts:
- Issavi Tombs (Issavi) better with death damage.
- Asuras Mirror (Port Hope) with physical or energy damage.
- Temple of the Moon Goddess (Marapur) better with envenomed damage.
- Cobra Bastion (Ankrahmun) better with fire damage.
- Roshamuul Plans (Roshamuul) better with ice damage.
- Catacombs (Oramond) with physical or energy damage.
- Dream Courts (Feyrist) with ice or fire damage respectively.
Party Hunt
Party Hunts: In parties, knights act as front‑line warriors. You should lead pulls and hold the monster pack for the team. Focus your rotation on quick threat: use blood rage followed by berserk/exori min and exori gran to quickly melt enemies so healers can follow. Charge into the mess to maximize your defense uptime (utamo tempo). Keep moving to stay between monsters and healers, using your speed and position to avoid back‑hits. Pull smaller groups at first to gauge the team's pace. Efficient knights pull, cast challenge to guarantee aggro, then whirl through the camp with AoEs, allowing your druid/ed to replenish after.
Defensive Management: Knights are party tanks, so manage your buffs smartly. Always have utamo tempo (protector) active when multiple monsters hit you. If healers are preoccupied, you may switch to blood rage to speed kills, but only if you're confident your hp won't drop catastrophically. Use exura ico spells early to reduce stress on the healer. Position yourself in doorways or chokepoints to limit how many creatures can attack your back. If approaching danger, cast utamo vita (exura vita) or drop a rune to reduce outgoing pressure. Remember that you can take hits – pull more and soak up damage so your teammates get safer with each kill.
Synergy: Coordinate tightly with your team. Use challenge (exeta res) whenever a pull starts so every monster attacks you first. If a druid is present, pop blood rage only when the druid is ready to mass heal. Communicate; call for sio from a druid before a big pull so you can safely blood rage without dying. Pair exori gran spells with your team's area spells (like druid waves) for burst. Share holy potions (if paladin can distribute) or juice runes (like Haste or Flame Strike) to speed up the team. Good knights adapt: if your partners are struggling, hold more monsters longer (use utamo). If they're strong, help them stack for maximum DPS (drop blood rage and rotate faster).
Party Hunts: Knights here take on tougher roles. Besides leading pulls, you may also help with CC. A rotation might be: Charge/Challenge to gather, blood rage for damage, then berserk and exori gran to clear. Keep utani hur on all the time to run between targets or save fleeing mobs. Use exura ico (heal) between pulls to lighten the healer's load. In harder parties, knights can press exana mort (mass paralyze) if needed. The goal remains: keep monsters on you and kill them fast so the weaker DPS and support classes survive. In mixed teams, knights can even handle side targets if they pop an extra potion (for example, taking a stray boss hit while main DPS focus adds).
Defensive Management: At these levels, teamwork means more mana on both sides. Maintain utamo tempo constantly – it lets your team focus fire without healing you as much. Swap to blood rage only when your healer announces extra mana or a lull in damage. Cast exura ico/gran ico frequently because higher levels scale your heal spells well. If retreating for health, call it early – knights often return with full health, keeping the party going. Encourage sharpshooters (spears, etc.) to trap monsters behind you using your push/back-wall. Keep track of your own HP; as the main tank, positioning and timing Utamo are your best defense.
Synergy: Focus on synergy spells: first ensure a druid's sio (exura gran mas) covers group heal, then follow with your blood rage/AoE to finish quickly. If a paladin is present, use exana tera (energy wave) on the block, then hit it with exori gran for overlapping damage. Castle strategies work well: the druid can lay walls or field spells, while you stand just inside catching monsters inside the barrier. For large pulls, coordinate a triad: knight challenges in, paladin traps outside, druid heals. Always watch your teammates: if your druid runs low on mana, use fewer buffs; if paladin circles back with imbuements (e.g. Fire, Energy), flank monsters to maximize damage.
Party Hunts: In high‑level teams, knights become damage dealers with exceptionally high survivability. Start large pulls with challenge and blood rage, then unleash exori gran, exori min, and exori mas in quick succession. Knights can safely use groundshaker and frenzy (if specced as a rune) in crowded spawns. Stay at the center of the pack, drawing as many hits as possible while your DPS focus-fire. Use ultimate firewalls or crystals (e.g. Spirit Walls, Chilling) and lead monsters through them. Because you hit so hard and soak so much, you set the pace – kill speed matters most at these levels.
Defensive Management: At this point, teams often have multiple healers; you can afford to toggle blood rage on more frequently. However, always keep utamo tempo on in between. Use potion macros or a high‐capacity charm to sip health potions with one keypress if clutch. Heal yourself with exura gran ico early in the fight (30‑40% HP) so healers top you off instead of reactively panicking. If needed, drop utamo vita before a boss special attack. In chaotic hunts, don't hesitate to reapply utamo tempo often – the marginal loss of damage is worth the extra block.
Synergy: Your burst pairs with guildmates perfectly. Coordinate with your druid for exani hur (mass haste) before starting a pull and exana mort for control. With paladins, use your challenges to allow their strikes (whirlwind, avalanche) to cleave crowds. Help mages by taking melee hits that would otherwise break their focus. In essence, provide a damage and aggro buffer so other classes unleash fully. Meanwhile, plug your own utility: clear patches of blocking fire fields with utamo, finish groups with annihilation timed to coincide with the last hits of paladin's exori vis or sorcerer's waves, and call for buffs like chill out (knight support) when needed.
Boss Fights
Role of the Knight: In boss encounters, the Knight is the primary tank and crowd controller. Stand between the boss and squishier allies, keeping aggro with Challenge (Exeta res) or Chivalrous Challenge (Exeta amp res). Use high-boost spells like Blood Rage only when your HP is safely above 50%. Position the boss facing you and leverage pillars or corners to avoid being swarmed. Time your big hits (Exori Gran Ico or Berserk) to the boss's vulnerable windows, and cast Exura Gran Ico or Utamo Vita proactively when low. Always block minions or ranged adds to maintain aggro.
Coordination with Healers & DPS: Communicate cooldowns—warn healers before you cast Blood Rage or reposition. If healers struggle, lean more on Protector (Utamo Tempo) to soak damage. With DPS partners, challenge adds to share aggro and let them stack AoEs (e.g. Energy Field, Avalanche) on the boss's position. In two-tank setups, switch targets on cue to avoid simultaneous vulnerability. Use Utamo or Exana Mort to mitigate boss burst mechanics.
Destiny Perks: On your Wheel of Destiny, invest in Battle Instinct and Battle Healing (Conviction) for extra shielding and passive lifesteal. Dedication perks in Mitigation and Hit Points boost raw durability. Prioritize Conviction augmentations like longer Protector buffs and extra Berserk damage. If available, pick Shield Expert (increased block) and Fortitude (damage reduction). Other useful perks include Adrenaline (attack speed) or Pwn Stance (reduce boss regen) to end fights faster.
Detailed Role Breakdown
| Aspect | Description |
|---|---|
| Tank & Crowd Control |
|
| Damage Timing |
|
| Team Coordination |
|
| Perks Utilization |
|
Monk
Managing incoming damage is crucial for a Monk. In party hunts, keeping utamo tempo active while alternating exura ico and exura ensures efficient damage absorption without overloading healers. In solo hunts, controlling creatures with exeta res combined with exura gran ico extends the hunt duration. Against bosses, timing utito tempo during peak damage phases is essential to avoid unexpected spikes.
Solo Hunt
Coming soon
Coming soon
Coming soon
Party Hunt
Coming soon
Coming soon
Coming soon
Boss Fights
Coming soon
Coming soon
Coming soon.
Paladin Spell Rotations
Mobility and distance management are essential for a Paladin. In party hunts, using utito tempo san combined with AoE attacks like diamond arrows maximizes damage without compromising safety. In solo hunts, an effective rotation of attacks with exura mas san allows maintaining offense while avoiding critical hits. In boss fights, holy spells can be decisive against holy-vulnerable enemies, and proper execution can optimize combat duration.
Solo Hunt
Basic Rotation: Paladins rely on quick distance spells. Use Ethereal Spear (exori con) as your bread‑and‑butter for single targets and Divine Missile (exori san) if 2–3 monsters are clustered. On packs of monsters, cast Divine Caldera (exevo gran mas san) followed by heavy runes (e.g. Great Fireball, Avalanche, Stone Shower ). Alternate with Strong Ethereal Spear (exori gran con) on tough targets. Maintain your Sharpshooter buff (utito tempo san, +40% distance skill for 10s) before engaging to maximize damage.
A typical cycle:
- Arrow (Diamond Arrows).
- Divine Caldera (Exevo gran san).
- Arrow (Diamond Arrows).
- Divine Caldera (Exevo gran mas san).
- Strong Ethereal Spear (Exori gran con) or Divine Missile (Exori san) to finish the lower healh mobs.
- Repeat, waiting for each spell's cooldown intercalating with Salvation (Exura gran san) for healing Great Spirit Potion.
Ultimate Spells: Key utility and burst spells include Divine Empowerment (utevo grav san): plants a 3×3 holy damage‑boosting field (base +8% damage at stage 1, +12% at stage 3). Holy Flash (utori san) applies a 10s Holy DoT to a target. Salvation (exura gran san) is a powerful instant heal. Sharpshooter and Swift Foot (utamo tempo san) are buffs: Sharpshooter grants +40% distance skill, while Swift Foot gives +80% speed for 10s but prevents attacking. Use Summon Paladin Familiar (utevo gran res sac, lvl 200) for extra DPS when available.
Survival: Heal with Divine Healing (Exura san) and Salvation (Exura gran san) when needed, and keep in mind paladins only regenerate 450 HP/h (600/h promoted), so you'll rely on potions often. Always have mana up and carry Energy Rings, you wil need them any danger and situations use Stone Skin Amulet to reduce huge hits – it blocks 80% of physical/death damage with Might Rings 20% for any elemental damage. For mana emergencies, carry Blessed Steaks (instant full mana refill) and Great/Ultimate Spirit Potions. Stay at distance from enemies and kite if health is low.
Suggest Hunts:
- Werehyenas (Darashia) better with ice damage.
- Catacombs (Oramond) with ice damage.
- Asuras Palace (Port Hope) with energy damage .
Basic Rotation: The core combat pattern stays similar. Continue spamming exori con on single targets and use exevo gran mas san on crowds. Now you have higher mana to sustain Divine Caldera and can incorporate high‑cost attacks. Keep Sharpshooter up, and mix in Strong Ethereal Spear (exori gran con) whenever a single target lingers. Use Salvation for emergencies. Always flank monsters at 2–3 squares (diagonally) for better hit chance.
A typical cycle:
- Arrow (Diamond Arrows).
- Divine Caldera (Exevo gran san).
- Arrow (Diamond Arrows).
- Divine Caldera (Exevo gran mas san).
- Strong Ethereal Spear (Exori gran con) or Divine Missile (Exori san) to finish the lower healh mobs.
- Repeat, waiting for each spell's cooldown intercalating with Salvation (Exura gran san) for healing Great Spirit Potion.
Ultimate Spells: At these levels you gain Divine Empowerment and Divine Grenade as talents: Divine Empowerment (+8–12% damage buff field) and Divine Grenade (exevo tempo mas san, lvl 300) which plants a 3s holy bomb under the target. Divine Grenade's cooldown shrinks from 26s at stage 1 to 14s at stage 3. Don't forget Holy Flash and Salvation from earlier, and use buffs/auras (Sharpshooter, Swift Foot) between pulls. Summon Familiar (lvl 200) also remains an option for burst DPS.
Survival: With higher HP and better gear, you can push on harder spawns. Still use Mana Shield + potions and Stone Skin Amulet for big hits. Cast Divine Empowerment at the start of fights for extra damage (and reduced need to kite). Blessed Steaks and Great Mana Potions remain key mana-safety tools. Keep a healing ring (Ring of Healing) or support potions, as you'll be hit by stronger monster attacks.
Suggest Hunts:
- Werelions (Darashia) better with ice.
- Roshamuul Lower/Middle/Upper (Roshamuul) better with ice damage.
- Catacombs (Oramond) with ice damage.
- Asuras Palace (Port Hope) with energy damage.
- Temple of the Moon Goddess (Marapur) better with envenomed damage.
Continue spamming your best spells. Ethereal Spear and Caldera remain the core, with Strong Eth Spear on single bosses. At this point your critical hit chance (with blessing or elements) can be very high, so burst with mana potions and Divine Empowerment/Divine Grenade for maximum damage. Use Sharpshooter/Swift Foot buff sequences whenever monsters respawn to keep up DPS.
The pattern is mostly unchanged: buff → Caldera + Runes → Caldera → spear spam. Ensure no downtime by alternating spell groups. If a boss moves unpredictably, switch to single attacks (exori con/gran con). Always have a plan to disengage (use Swift Foot to break leash if needed) and retreat 2–3 squares as required.
Survival: At high levels bosses hit very hard. You must lean on gear and consumables. Use Protector spells and Utamo Vita from Knight teammates when available, and precast your own heal (Salvation or Intense Recovery) as fights start. Carry Ultimate Health/Mana Potions and Spirit Potions for emergencies. Blessed Steaks still clear mana downtime. If facing one-shot mechanics, the Gift of Life Revelation perk (life-saving heal) can buy a replay. Get high HP from equipment and maximized Dedication HP perks (see below) to survive multi-hit combos.
Suggest Hunts:
- Roshamuul Lower/Middle/Upper (Roshamuul) better with ice damage.
- Catacombs (Oramond) with ice damage.
- Asuras Palace (Port Hope) with energy damage.
- Temple of the Moon Goddess (Marapur) better with envenomed damage.
Party Hunt
As a team member, the Royal Paladin typically focuses on ranged DPS. Let a Knight tank upfront and a Druid focus on healing/buffs. Paladins excel at killing weak swarms that the tank gathers. Use area attacks (Divine Caldera + runes) to quickly clear mobs that surround the tank. Keep buffs like Sharpshooter up so your DPS is maximized without needing to reposition too often.
Healing & Positioning: Always stand 2–3 squares behind or to the side of the tank (diagonals give you a hit bonus) so you don't draw aggro. Use your instant heals (Exura ico/Salvation) on yourself or allies when needed, and consider sharing Great Spirit/Ultimate Spirit for emergency healing. Stay close enough to provide cover fire, but far enough to avoid boss melee hits. If the Knight is low, help by swapping into Mana Shield on them or using Cure Curse on enemies afflicting teammates. Carry plenty of yellow and blue potions to back up the Druid's healing when they are busy.
Synergy: Paladins pair well with Knights and Druids. When a Knight uses Chivalrous Challenge or Protector, ensure you capitalize by firing into the disrupted enemies. Apply Sharpshooter to boost your own ranged damage (which indirectly helps Druids by shortening fights). Coordinate with Sorcerers: if a Sorcerer uses a large AoE rune, follow up with your Divine Caldera to maximize coverage. Give mana potions or crystal coins to sorcs/druids as needed. In mixed hunts (undead vs elemental), your Divine spells (Holy) and arrows supplement the team's elemental attacks. Overall, stay flexible: if the sorc is busy DPSing, be ready to heal or kite; if you are leading, communicate to avoid friendly-fire AoEs.
Roles remain similar but stakes are higher. In this range, teams often tackle multiple bosses or rapid‑fire elite spawns. Paladins should focus fire on secondary targets (adds or weak damage dealers) so the Knight can keep the main boss engaged. Use your best spells to relieve pressure: for example, drop Divine Grenade on monsters the tank is protecting, or use Divine Empowerment just before a big strike phase.
Healing & Positioning: Maintain safe distance (2–3 squares) from shifting mechanics but stay in range to contribute. Use Intense Recovery on yourself when low, and Salvation if the tank or squishy teammate needs help (it can be cast on another player). Remain aware of the boss's area attacks: sidestep or Swift Foot out of AoEs. If Druid is lagging, consider pre‑emptively using a life or mana potion on yourself to free them up. Share group mana boosters (Ultimate Spirit Potions) to keep casters going.
Synergy: At these levels, teamwork unlocks many tactics. Paladins' ranged attack and AoE skills complement melee tanks and casters. Use Cure Curse to help tanks against poison/curse ailments. Coordinate with Knights: if they cast Blood Rage (exana vita) on themselves, follow with a burst to capitalize on their temporary immunity. If Druids use Crystals' armor or Exura Gran, time your Divine Empowerment field to coincide with their buffs. With Sorcerers, chain effects: a Sorcerer's Thunderstorm rune followed by your Divine Caldera can insta-kill weaker monsters. Remember that Paladins are heavier on DPS, so keep your focus on damage output and let the priest-vocation handle most healing.
In high‑end hunts and boss fights, the Paladin often serves as a pure DPS source or a hybrid DPS/support. When soloing a boss in a group, queue up your strongest attacks while avoiding shared-damage mechanics. In chaotic raids, aim your AoEs at clusters of adds or waiting-for-target enemies. If the team opens a divine field (buff), capitalize on it immediately – for example, cast Divine Empowerment before a synchronized strike round.
Healing & Positioning: At this tier, positioning is even more crucial. Stay out of lethal blast zones and ambush patterns. Use Swift Foot to run out when the boss does a sweeping attack. If the tank gives a shout for help, quickly fire a Salvation or health potion his way. Support players appreciate if you keep Utamo Vita (Divine Shield, from a Knight) or Protector (spam-shield) available via communication, even though you can't cast them – time your own actions (like dropping a Divine Grenade) to cover those moments. Carry all Major Healing/Mana potions and preferably stamina boosters; your own regeneration (600 hp/600 mana per hour), while better than early-game, still lags behind hard-hitting bosses.
Synergy: The Paladin shines alongside top-tier buddies. In boss fights, sync your attacks with critical windows. For example, when a boss is stunned or invulnerable, lay down the Gift of Life (if hit hard) or call for the team to share hps. If the party includes a warrior, help by luring ranged mobs into the tank (even if it means stepping back temporarily). Grant any crowd-control support: use Exura Ico to overheal at low risk moments, or provide emergency HP to teammates. Your Positional Tactics (paladin Conviction perk, +3 distance fighting when alone) and Battle Healing (knight perk) are typically chosen by knights, but if a Paladin somehow chose Battle Healing, it would passively heal you for each challenged creature – nonetheless, focus on dealing damage and let others cover defense.
Boss Fights
Behavior & Rotation: Against bosses, Paladins push maximum sustained DPS. Open with buffs (Sharpshooter, Divine Empowerment) and unleash spells when the boss is stationary. Watch for vulnerability windows—cast Divine Grenade and heavy runes in those phases. Keep spamming exori con/exori gran con as filler. Do not kite recklessly—run to safe spots when needed, then return to attack immediately. If minions spawn, switch to area attacks to clear them before refocusing the boss.
Team Coordination: Call out boss phases to sync with tanks and druids. Let the Knight taunt or use Chivalrous Challenge on summons before you nuke. Ask for Utamo Vita (Divine Shield) or Protector on yourself before big hits. If the tank drops low, use Salvation or hand over a health potion. Share status—if the druid is low on mana, pass a mana potion. Paladins benefit when Knights time Blood Rage with your bursts. Employ your heals (Salvation, Exura Gran San) to save teammates in chaotic moments.
Defensive Utility: Paladins lack innate reflect or aura, so rely on items and spells. Use a Stone Skin Amulet on cooldown for unavoidable hits. If the boss leeches life, time your recovery spells. Stay behind the front line—let Knights or high-EHP gear absorb frontal strikes. If you have a Protector Stone or similar reward-based spell, use it during spike phases. Keep Blessed Steaks or other mana-restoring food on hand to prevent downtime.
Wheel Perks: Pick perks that boost DPS and survivability. Combat Mastery (Revelation) adds +10–30% shield defense or +4–12% crit damage. Battle Healing (Conviction) grants passive lifesteal per challenged monster. Divine Empowerment and Divine Grenade (Revelation) dramatically increase boss damage. Consider Gift of Life for emergency overheals and Dedication perks in Mitigation for raw damage reduction.
Detailed Role Breakdown
| Aspect | Description |
|---|---|
| Behavior & Rotation |
|
| Team Coordination |
|
| Defensive Utility |
|
| Wheel Perks |
|
Sorcerer Spell Rotations
As the main source of magical damage, a Sorcerer must balance explosiveness and sustainability. In party hunts, synchronizing your attacks with waves like energy wave or fire wave exponentially increases team DPS. In solo hunts, proper positioning and sustained pressure using exevo gran vis lux or exevo gran mas flam while utilizing exura for regeneration is key. Against bosses, managing mana with utamo vita and using ultimate explosion at the right moments can mean the difference between an efficient victory and excessive resource consumption.
Solo Hunt
Basic Rotations: A typical spell rotation centers on alternating strong AoE and single-target attacks. For example, use Energy Wave (exevo vis hur) and Great Fire Wave (exevo gran flam hur) for area damage, then finish off tougher targets with heavy beam spells like Great Energy Beam (exevo gran vis lux) and Hell's Core (exevo gran mas flam). Sorcerers also use Cold-based spells (Ice Strike) or Death Strike to exploit monster weaknesses. Ultimate spells become available at higher levels: Ultimate Flame Strike (exori max flam) and Ultimate Energy Strike (exori max vis) deliver massive single-target damage, ideal for burst phases. Early on, Magic Shield (utamo vita) is crucial for survival, absorbing damage into Mana.
A typical cycle:
- Great Fire Wave (exevo gran flam hur).
- Energy Wave (Exevo vis hur).
- Great Fire Wave (exevo gran flam hur).
- Area rune (e.g., Avalanche / Great Fireball / Stone Shower).
- Repeat, waiting for each spell's cooldown intercalating UE's cooldowns.
Ultimate spells: Use Ultimate Flame Strike/Ultimate Energy Strike as finishers – each deals enormous elemental damage on a single target (level 90/100 spells). Great Death Beam (unlocked via the Wheel) pummels enemies in front in an 8-tile beam. Avatar of Storm (level 300 revelation) grants temporary crit-hit aura and +damage reduction. Gift of Life (all-vocation revelation) will auto-heal you if you'd take fatal damage.
Survival: Always stay at range (2–3 squares) using obstacles (trees, pillars, stairs) to block line of sight. Drink Mastermind Potions between fights to increase your magic level. Summoned creatures can block shots and buy time. Use Magic Shield (Utamo vita) to absorb high peak damage and then use Cancel Magic Shield (Exana vita) only when safe. Defensive mode (Shielding) halves incoming melee damage.
Suggest Hunts:
- Gnome Deep Hub (Kazordoon Gnomish area) with Avalanche runes.
- Lycantrope Cave (Edron) with Great Fireball runes.
- Glooth Factory (Oramond) with Great Fireball runes.
- Dreams Court (Feyrist) hunts using Avalanche or Great Fireball respectively against grouped monsters.
- Issavi Tombs (Issavi) with Avalanche/Sudden Death runes.
Spell rotation: By 300+, Sorcerers gain even stronger AoEs. Continue using Great Fire Wave and Energy Wave as core spells. Add Lightning (exori amp vis at 55) for long-range single hits. Use Energy Beam and Death Strike for flexible damage. Summoned creatures (e.g. Demon Skeletons) can occupy and attract enemies. Maintain a cycle of AOE→single-target→AA (attack attack) → large spell.
Ultimate spells: Keep Hell's Core and Rage of the Skies on cooldown – they clear large groups. Now your Ultimate Flame/ Energy Strikes are critical for bosses or elite monsters. Use Great Fireball (exevo flam) on clustered enemies.
Survival: Continue using Magic Shield proactively. Use Strong Haste (Utani gran hur) and Strong Haste to reposition and kite enemies. Drink Ultimate Mana Potions frequently to fuel constant spells. Team up with blockers or summon trolls to soak hits.
Suggest Hunts:
- Dream Courts (Feyrist) hunts using Avalanche or Great Fireball against grouped monsters.
- Cobra Bastion (Ankrahmun) using Great Fireball against grouped monsters.
- Netherworld (Port Hope) with Great Fireball runes.
- Issavi Tombs (Issavi) with Avalanche runes.
Spell rotation: In this bracket Sorcerers unlock their last spells. Continue heavy AoE cycling and use Enchant Party (utori mas sio) to buff party ML. Restoration (exura max vita) is now the ultimate heal spell. Expose Weakness and Sap Strength (vocation spells) apply debuffs (buff party damage), enhanced by Drain Body perks. For big pulls, use Lightning Strike and Energy Beam combos.
Ultimate spells: Ultimate Flame/Energy Strike are now lethal nukes. Use Great Death Beam at stage 3 for immense damage. For bosses (true dragons, Felugoths, Demon Lords), stack multiple beam hits to proc massive bonus from Beam Mastery.
Survival: Your MP pool is vast; spam Ultimate Mana to keep spamming. Use Avatar of Storm (60–120 min CD) for boss bursts and survivability. Always have Cancel Magic Shield handy after spells to resume HP regen. Use Stone Skin Amulet and Might Rings immediately if trapped to boost survivability. Carry Blessed Steaks and Blueberry Cupcakes as your primary mana foods; they have separate cooldowns so you can chain them for massive instant mana refills.
Suggest Hunts:
- Dream Courts (Feyrist) hunts using Avalanche or Great Fireball against grouped monsters.
- Cobra Bastion (Ankrahmun) using Great Fireball against grouped monsters.
- Netherworld (Port Hope) with Great Fireball runes.
- Issavi Tombs (Issavi) with Avalanche runes.
Party Hunt
Party Hunt: Sorcerers serve as the primary ranged DPS, unleashing Energy Wave (exevo vis hur) and Great Fire Wave (exevo gran flam hur) to clear pulls grouped by the tank. Finish off stubborn targets with Lightning (exori amp vis) or Hell's Core (exevo gran mas flam) for quick burst damage on high-HP monsters. Carry Enchant Party (utevo mas sio) runes to boost all party members' Magic Level by +1 for 2 minutes, enhancing collective spell power in prolonged hunts.
Healing & Positioning: Stand behind the main tank (Knight/Paladin) to avoid frontal hits. Use obstacles to fire diagonal beams safely. In tight spaces, cast Energy Beam from distance. Keep Magic Shield active during pulls to share damage. If a frontline ally is low, use instant heals. Though not primary healers, Sorcerers must carry on Ultimate Healing rune to support when knight get a high peak damage or even when druid's are busy. If needed, cast Enlighten Party (utevo mas sio) to slowly regen party Mana. In coordinated pulls, initiate with AoE spells (Energy Wave, Firestorm) to cluster mobs around the tank. Then spam ultimate spells on clumps. When tanks mark targets, finish them off with Ultimate Strikes. Rotate defensive spells on cast cooldown. Use Invisible (utana vid) for sneaking or regrouping as needed.
Synergy: Begin each pull by casting Expose Weakness (exori moe) on the target to increase its damage taken by 4%, amplifying both your AoEs and melee allies' hits. Use Enchant Party early so that even knights and paladins gain the bonus Magic Level for stronger elemental attacks during the fight. Coordinate with paladins/knights: have them use Challenge (exeta res) or Blood Rage (Utito tempo) to hold aggro, allowing you to safely unload your strongest spells from range.
Party Hunt: At these levels, Sorcerers escalate their DPS with Energy Beam (exori max vis) and Great Death Beam (unlocked via Beam Mastery), using Energy Wave (Exevo vis hur) or Great Fireball (exevo gran flam) runes for crowd control. Debuff tougher targets with Sap Strength (exori kor) to enlarge the affected area and reduce their damage output, then follow up with high-cost AoE spells for maximum efficiency. Maintain Enchant Party buff for +1 Magic Level on all allies, crucial for wizards and druids in extended pulls.
Healing & Positioning: Stand behind the main tank (Knight/Paladin) to avoid frontal hits. Use obstacles to fire diagonal beams safely. In tight spaces, cast Energy Beam from distance. Keep Magic Shield active during pulls to share damage. If a frontline ally is low, use instant heals. Though not primary healers, Sorcerers must carry on Ultimate Healing rune to support when knight get a high peak damage or even when druid's are busy. If needed, cast Enlighten Party (utevo mas sio) to slowly regen party Mana. In coordinated pulls, initiate with AoE spells (Energy Wave, Firestorm) to cluster mobs around the tank. Then spam ultimate spells on clumps. When tanks mark targets, finish them off with Ultimate Strikes. Rotate defensive spells on cast cooldown. Use Invisible (utana vid) for sneaking or regrouping as needed.
Synergy: Pre-cast Expose Weakness on elite adds or mini-bosses to boost party DPS by 4%, and follow with Sap Strength for added damage reduction on the target, helping tanks survive tougher spawns. Use Enchant Party at the start of each pull so the entire team benefits from raised Magic Level when cycling runes and spells. Coordinate with druids: have them lay Mass Healing or Haste (utani hur) just before your biggest AoEs to keep you mobile and topped off between bursts.
Party Hunt: Endgame hunts see Sorcerers combining Great Death Beam, Hell's Core, and Rage of the Skies (exevo fulmin) for colossal burst damage on boss adds and respawns alike. Layer Expose Weakness and Sap Strength on high-HP targets to maximize damage windows—both spells also work on bosses, making them valuable even in raid scenarios. Keep Enchant Party active continuously to maintain +1 Magic Level, which at this tier can swing DPS by hundreds of extra damage per spell cycle.
Healing & Positioning: Stand safely at range, refresh Magic Shield only after brief HP recovery, and use Stone Skin Amulets and Might Rings on cooldown to survive heavy boss hits and area-of-effect mechanics. Rely on Ultimate Mana Potions and emergency Blessed Steak/Blueberry Cupcake rotations to prevent any gap in your shield uptime during relentless boss phases. For prolonged fights, bring Dinner Rolls or Ice Cream for minor HP regen between shield cycles if needed.
Synergy: In parties, pre-buff with Expose Weakness and Sap Strength so that each of your massive beams and runes, as well as your teammates' abilities, benefit from the +4% damage taken effect. Coordinate Enchant Party renewals with druids' Energy Wall or paladins' Divine Empowerment fields to stack ML buffs and holy damage boosts simultaneously. When facing mixed-element spawns, call out resistances and adjust your AoEs (fire/energy/death) in sync with the paladin's Divine Caldera or the druid's waves for seamless, high-output combo damage.
Boss Fights
Behavior & Rotation: Start with instant‐cast buffs (Haste, Enchant Party). Cast Expose Weakness to boost damage taken, then follow your core burst loop: Energy Wave → Great Fire Wave → AOE rune (Avalanche or Great Fireball) → Energy Wave → Hell's Core. Reserve Great Death Beam for tightly grouped adds. Use a focus spell (Hell's Core or Rage of the Skies) to trigger Focus Mastery, then immediately cast your hardest‐hitting spell for +35% bonus. Keep Magic Shield active to absorb damage into mana, deactivating briefly to recover HP between phases.
Team Coordination: Communicate your opening rotation so tanks can hold aggro on adds while you unload AoEs. Ask paladins/knights to cast Challenge on secondary targets, and druids to summon blocking creatures (Fire Elementals, Earth Elementals) for clear lines of sight. If healers need a break, switch to Summon Creature to distract the boss before resuming full DPS.
Detailed Role Breakdown
| Aspect | Description |
|---|---|
| Positioning & Mechanics Awareness |
|
| Adaptive Spell Rotation |
|
| Support & Debuff Application |
|
| Wheel Perks in Action |
|
 Wheel of Destiny Spell Highlights
The Druid wheel has four domains for Dedication, Conviction, and Revelation perks. Dedication perks gradually boost stats (e.g., +HP, +MP) with each point. Conviction perks give medium effects (spell augments or passives), and Revelation perks are powerful tiered abilities unlocked at 250/500/1000 points in a domain. Below is a breakdown of the key Druid perks:
Revelation Perks
| Perk | Description & Stages |
|---|---|
Blessing of the Grove |
Increases all healing based on the target's HP (passive).
|
Twin Bursts |
Unlocks Ice Burst & Terra Burst AoEs.
|
Gift of Life |
Prevents fatal blow; overheal heals up to 30% HP.
|
| Avatar of Nature |
Reduces damage taken and adds extra critical damage.
|
Conviction Perks
| Perk | Effect | ||||||||||||||||||
|---|---|---|---|---|---|---|---|---|---|---|---|---|---|---|---|---|---|---|---|
Healing Link |
Gain +10% healing when you heal another. (Flat bonus) | ||||||||||||||||||
Spell Augmentations
(Augmentation bonuses stack additively.) |
|||||||||||||||||||


Dedication Perks
Dedication Perks sit on the outer rim of the Elder Druid's Wheel of Destiny and grant small, incremental boosts to core stats. Each promotion point you invest increases its bonus by a fixed amount up to the slice's maximum. For EDs blending support, tanking, and off-DPS, allocating points here boosts survivability and utility.
| Slice | Effect | Numeric Bonus | Notes |
|---|---|---|---|
| Hit Points | Raises maximum HP based on druidic HP gain per level |
|
Druids gain +5 HP/level; first point ≈60% of level's HP |
| Mana | Increases maximum Mana by druidic MP gain per level |
|
Boosts sustain for long hunts (more spells before potions) |
| HP & Mana | Combined slice granting both HP and MP | Follows same proportions as individual HP/MP slices | Ideal for balanced support and off-DPS roles |
| Capacity | Increases carry capacity |
|
Druids gain +10 oz/level; helps with loot-heavy runs |
| Mitigation | Multiplicatively reduces incoming damage types | +0.03% damage reduction per point | Softens hits, enhancing survivability |
Why Dedication Perks Matter
- Tanking & Survivability: HP slices boost health pool; Mitigation reduces each hit's impact.
- Mana Sustainability: MP slices allow more spells before potions.
- Endurance on Hunts: Capacity slices minimize trips.
- Group Utility: Balanced HP/MP ensures reliable support.
Recommended Wheel Paths
| Party-Support Build |
|
| Boss/DPS Build |
|
| Hybrid Build |
|
Wheel of Destiny Perks for Knight
The Knight wheel has three domains: Dedication, Conviction, and Revelation. Dedication perks grant steady stat boosts (e.g., +HP, +Shielding) per point. Conviction perks enhance your core spells and passive abilities, while Revelation perks unlock powerful tiered abilities at 250/500/1000 points. Below is the complete Knight Wheel breakdown:
Revelation Perks
| Perk | Description & Stages |
|---|---|
Executioner's Throw
|
Throws your weapon at the target, bouncing to nearby enemies. Deals double damage to targets below 30% HP.
|
Combat Mastery
|
Passive boost to shield defense or critical damage when using two-handed weapons.
|
| Gift of Life |
Prevents fatal blow; overheal heals up to 30% HP.
|
| Avatar of Nature |
Reduces damage taken and adds extra critical damage.
|
Conviction Perks
| Perk | Effect | ||||||||||||||||||
|---|---|---|---|---|---|---|---|---|---|---|---|---|---|---|---|---|---|---|---|
Battle Instinct
|
Grants +6 shielding and +1 weapon skill for every 5 adjacent enemies; each additional adds +6 shielding and +1 skill. | ||||||||||||||||||
Battle Healing
|
Passive lifesteal per challenged monster; doubles if below 60% HP, triples if below 30% HP. | ||||||||||||||||||
Spell Augmentations
(Augmentation bonuses stack additively.) |
|||||||||||||||||||


Dedication Perks
Every point in the Dedication domain yields permanent stat increases. For Knights, more HP and mitigation means lasting through heavy fights, while a touch of extra mana keeps shields up. Unlike other perks, these bonuses are guaranteed and scale with your existing stats. Over time, they amplify your tankiness—making it easier to withstand boss bursts or large mob pulls.
| Slice | Knight Bonus (per point) |
|---|---|
| Hit Points | +3 HP |
| Mana | +1 Mana |
| HP & Mana | +2 HP & +1 Mana (approx.) |
| Capacity | +5 Carrying Capacity |
| Mitigation | +0.03% damage reduction |
Why Dedication Perks Matter
- Tanking & Survivability: HP slices boost health pool; Mitigation reduces each hit's impact.
- Mana Sustainability: Mana slices allow more Shield spells before potions.
- Endurance on Hunts: Capacity slices minimize trips back for loot or supplies.
- Group Utility: HP & Mana slices ensure you can sustain both defensive and offensive roles.
Recommended Wheel Paths
| Defensive Tank Build |
|
| Aggro DPS-Tank Hybrid |
|
| Solo Boss Build |
|
Wheel of Destiny Perks for Paladin
The Paladin wheel has three domains: Dedication, Conviction, and Revelation. Dedication perks grant steady stat boosts (e.g., +HP, +Mana) per point. Conviction perks enhance your core spells and passive abilities, while Revelation perks unlock powerful tiered abilities at 250/500/1000 points. Below is the complete Paladin Wheel breakdown:
Revelation Perks
| Perk | Description & Stages |
|---|---|
Divine Empowerment
|
Creates a 3×3 holy field that boosts allied damage.
|
Divine Grenade
|
Plants a holy bomb beneath the target that explodes shortly after.
|
|
Avatar of Light |
Transforms you into a radiant avatar: guaranteed critical hits & damage reduction.
|
|
Gift of Life
|
Prevents a lethal blow and heals you; resets all spell cooldowns.
|
Conviction Perks
| Perk | Effect | ||||||||||||||||||
|---|---|---|---|---|---|---|---|---|---|---|---|---|---|---|---|---|---|---|---|
Positional Tactics
|
Gain +3 distance fighting while no monster is within 1 square. Otherwise gain +3 holy and +3 healing magic level. |
||||||||||||||||||
Ballistic Mastery
|
The critical extra damage for attacks with a crossbow is increased by 10%. If you attack with a bow, your attacks and spells treat the physical and holy sensitivity as being 2% higher for all enemies you hit. |
||||||||||||||||||
Spell Augmentations
(Augmentation bonuses stack additively.) |
|||||||||||||||||||


Dedication Perks
| Slice | Paladin Bonus (per point) |
|---|---|
| Hit Points | +3 HP |
| Mana | +1 Mana |
| HP & Mana | +2 HP & +1 Mana |
| Capacity | +5 Carrying Capacity |
| Mitigation | +0.03% Damage Reduction |
Why Dedication Perks Matter
- Tanking & Survivability: HP slices boost health; Mitigation reduces damage taken.
- Mana Sustainability: Mana slices support more sustained spellcasting.
- Endurance on Hunts: Capacity slices minimize return trips.
- Group Utility: HP & Mana ensure reliable support and DPS.
Recommended Wheel Paths
| Solo DPS Paladin |
|
| Party-Support Paladin |
|
| Hybrid Paladin |
|
Wheel of Destiny Perks for Sorcerer
Master Sorcerers can invest Wheel of Destiny points into three domains – Dedication, Conviction, and Revelation – to customize their playstyle. Dedication Perks grant small, incremental bonuses to base stats (HP, mana, capacity, etc.), gradually enhancing survivability. Conviction Perks augment existing spells or grant passive effects like cooldown reduction and damage boosts. Revelation Perks unlock powerful new abilities unique to Sorcerers at 250/500/1000 points.
Revelation Perks
| Perk | Description & Stages |
|---|---|
|
Avatar of Storm |
Become an elemental avatar: damage reduction, extra crit damage, and elemental crit chance.
|
Beam Mastery
|
Unlocks Death Beam improvements: per-target CD reduction & beam damage bonus.
|
Drain Body
|
Adds mana & life leech to crippling debuffs.
|
Conviction Perks
| Perk | Effect | ||||||||||||||||||
|---|---|---|---|---|---|---|---|---|---|---|---|---|---|---|---|---|---|---|---|
Focus Mastery
|
After casting a focus spell (Hell's Core or Rage of the Skies), next damaging spell within 12s deals +35% damage. | ||||||||||||||||||
Spell Augmentations
(Augmentation bonuses stack additively.) |
|||||||||||||||||||


Dedication Perks
| Slice | Effect & Costs |
|---|---|
| Hit Points | +Max HP per point; costs 3/2/1/1 points per stage |
| Mana | +Max Mana per point; costs 1/3/6/6 points per stage |
| HP & Mana | Combined HP+Mana; costs 3/2/1/1 points per stage |
| Capacity | +Carry Capacity; costs 5/4/2/2 points per stage |
| Mitigation | +0.03% damage reduction per point (multiplicative) |
Why Dedication Perks Matter
- Survivability: HP slices boost your health pool for tougher fights.
- Mana Sustain: Mana slices let you cast more spells before potions.
- Endurance: Capacity slices reduce return trips for supplies.
- Damage Reduction: Mitigation slices multiply to soften each hit.
Recommended Wheel Paths
| DPS / Boss Build |
|
| Hybrid AoE/Boss Build |
|
| Sustain / Tankier Build |
|